
OEM GRID CONTROL 11gR1 INSTALLATION
In this article I will write about Oracle Enterprise Manager Grid Control 11g R1 installation on Linux. With 11g OEM Grid Control you must first install the repository database and the middleware application before installing the grid control software. It is different from 10g. I will write Grid Control 11g R1 installation step by step.
PREPARATION BEFORE INSTALLATION:
First let’s download installation files
1- Download Oracle Enterprise Linux 5 Update 5 for x86_64 64 bit.
http://edelivery.oracle.com/linux
2- Download Java SE Development Kit 6u20 Java over following link.
https://cds.sun.com/is-bin/INTERSHOP.enfinity/WFS/CDS-CDS_Developer-Site/en_US/-/USD/ViewProductDetail-Start?ProductRef=jdk-6u20-oth-JPR@CDS-CDS_Developer
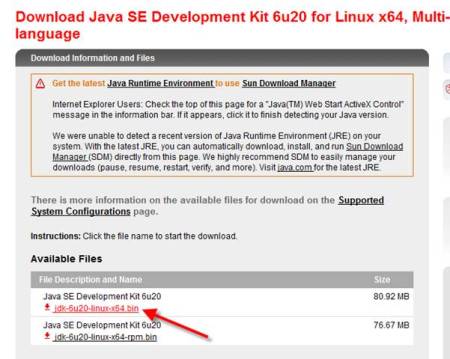
Choose Linux x64 (64bit) and click “Continue”.
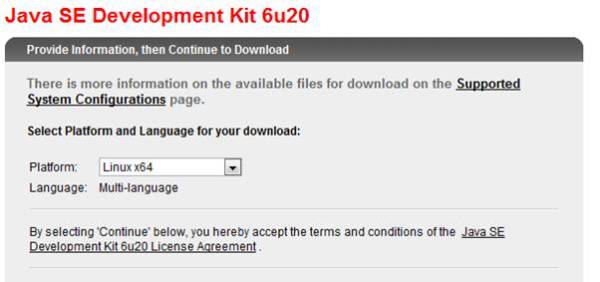
Download file which I signed it.
3- Download Oracle Database 11gR2 for Linux 64 bit software.
http://www.oracle.com/technetwork/database/enterprise-edition/downloads/index.html
4- Download OPatch last version.
https://updates.oracle.com/ARULink/PatchDetails/process_form?patch_num=6880880
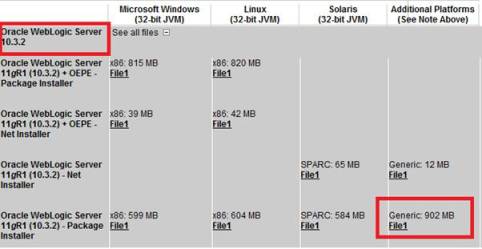
5- Download Oracle WebLogic Server 11gR1 (10.3.2) – Generic Installer. For 64 bit installation you must download Generic file.
http://www.oracle.com/technetwork/middleware/ias/downloads/wls-main-097127.html
6- And download Oracle Enterprise Manager Grid Control 11gR1 software.
http://www.oracle.com/technetwork/oem/grid-control/downloads/index.html
7- Copy downloaded files from windows to linux over WinSCP program.
OPERATING SYSTEM (ENTERPRISE LINUX 5) INSTALLATION:
1- You can install Oracle Enterprise Linux 5 as following link.
http://taliphakanozturken.wordpress.com/2010/12/12/oracle-enterprise-linux-5-installation/
2- Configure linux for database installation.
http://taliphakanozturk.wordpress.com/2010/12/21/oracle-database-11g-r2-kurulumu-icin-enterprise-linux-uzerinde-yapilmasi-gerekenler/
JAVA JDK 6u20 INSTALLATION:
1- Install Java JDK 6u20 with root user.
$ chmod u+x jdk-6u20-linux-x64-rpm.bin
$ ./jdk-6u20-linux-x64-rpm.bin
Output of above commads;
Sun Microsystems, Inc. Binary Code License Agreement
for the JAVA SE DEVELOPMENT KIT (JDK), VERSION 6
Do you agree to the above license terms? [yes or no]
yes
Unpacking…
Checksumming…
Extracting…
UnZipSFX 5.50 of 17 February 2002, by Info-ZIP (Zip-Bugs@lists.wku.edu).
For more information on what data Registration collects and
how it is managed and used, see:
http://java.sun.com/javase/registration/JDKRegistrationPrivacy.html
Press Enter to continue…..
Done.
2- Login as “oracle” user and edit bash_profile to add following lines.
JAVA_HOME=/u0/app/JDK/jdk1.6.0_20/; export JAVA_HOME
PATH=$JAVA_HOME/bin:$PATH; export PATH
ORACLE DATABASE 11gR2 INSTALLATION:
1- You can install Oracle Database 11g R2 as following link.
http://taliphakanozturken.wordpress.com/2011/01/01/oracle-database-11g-r2-installation/
2- Install following rpm packages for WebLogic ve Grid Control with root user.
cd /media/cdrom/Server
rpm -Uvh compat-db-4*
rpm -Uvh compat-libstdc++-296*
rpm -Uvh rng-utils-2*
rpm -Uvh setarch-2*
3- Deconfigure Oracle Enterprise Manager
$ emca -deconfig dbcontrol db -repos drop -SYS_PWD -SYSMAN_PWD
4- Set following database parameters.
$sqlplus / AS SYSDBA
SQL>ALTER SYSTEM SET log_buffer=10485760 SCOPE=SPFILE;
SQL>ALTER SYSTEM SET processes=500 SCOPE=SPFILE;
SQL>ALTER SYSTEM SET session_cached_cursors=200 SCOPE=SPFILE;
5- Our UNDO tablespace must be at least 200M. And it is recommended that UNDO_MANAGEMENT is AUTO
$sqlplus / AS SYSDBA
SQL>ALTER SYSTEM SET UNDO_MANAGEMENT=AUTO SCOPE=SPFILE;
Note: After this parameter changes you must shutdown and startup database.
6- Install latest OPatch.
$ cd /oracle/kurulum/GridControl/db_patches
$ unzip -d $ORACLE_HOME p6880880_112000_Linux-x86-64.zip
7- It is recommended to intall 9002336 and 9352237 patches for 11gR1 Grid Control installation .
$sqlplus / AS SYSDBA
SQL>shutdown immediate;
SQL>exit;
$ export PATH=$PATH:$ORACLE_HOME/OPatch
$ cd /oracle/kurulum/GridControl/db_patches
$ unzip p9352237_112010_Linux-x86-64.zip
$ cd 9352237
$ opatch apply
$ cd ..
$ unzip p9002336_112011_Linux-x86-64.zip
$ cd 9002336
$ opatch apply
$ cd ..
$sqlplus / AS SYSDBA
SQL>startup;
SQL>exit;
MIDDLEWARE (WEBLOGIC 10.3.2) INSTALLATION:
1- Login as oracle user and let’s start WebLogic installation.
$ cd /oracle/kurulum/WebLogic
$ java -Djava.io.tmpdir=/ora_tmp -d64 -jar wls1032_generic.jar
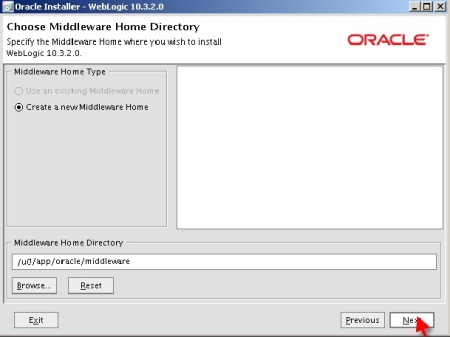
2- Click Next

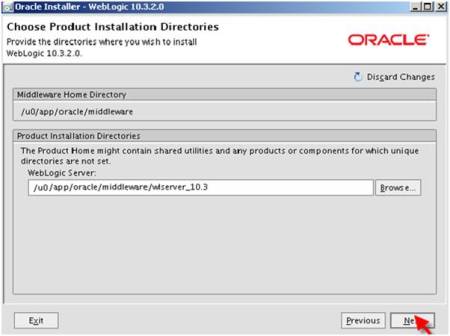
3- Choose Middleware home path.
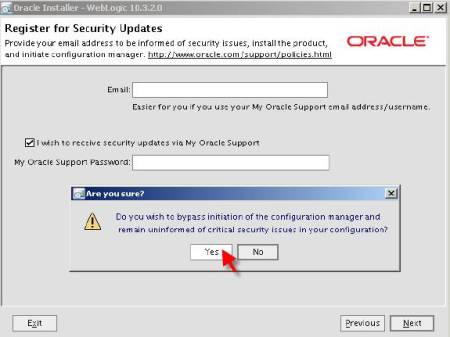
4- Uncheck “I wish to receive security updates via My oracle Support”. And click Yes to continue.
5- Choose “Typical” option.
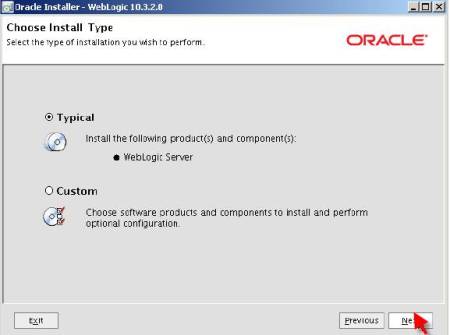
6- Click Next.

7- Click Next.
8- And let’s start installation

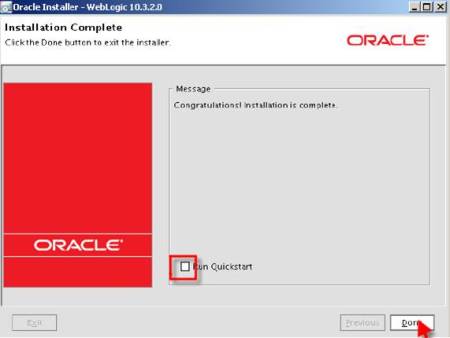
9- Uncheck “Run Quickstart” checkbox and click Done button
10- Before Grid Control installation we must install patches for 8990616, 9100465 and 9221722 bugs. You can install this patches with “Smart Update Tool” which locates in $BEA_HOME/utils/bsu directory. To install patches with this tool, your server must be connected to internet.
$ cd /u000/app/oracle/middleware/utils/bsu
$ ./bsu.sh

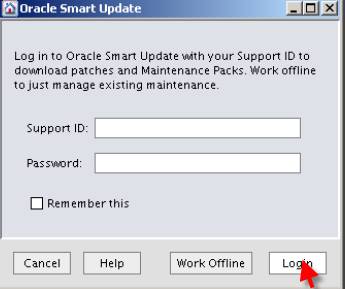
Click OK to start “Oracle Smart Update” tool. Enter the support id and password.
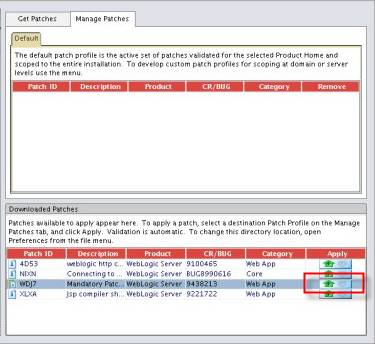
11- In“Smart Update Tool” screen go to “Get Patches” tab. Sign “WDJ7” patch and click “Download Selected” button.

12- After download go to “Manage Patches” tab and click “Apply” button.
OEM GRID CONTROL 11gR1 INSTALLATION:
1- Unzip installation files. And start runInstaller.
$ cd /oracle/kurulum/GridControl/11.1.0.1.0
$ unzip GridControl_11.1.0.1.0_Linux_x86-64_1of3.zip
$ unzip GridControl_11.1.0.1.0_Linux_x86-64_2of3.zip
$ unzip GridControl_11.1.0.1.0_Linux_x86-64_3of3.zip
$ ./runInstaller
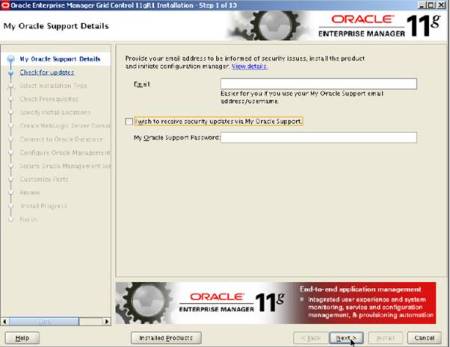
2- Uncheck “I wish to receive security updates via My oracle support” chekbox. And click Next.
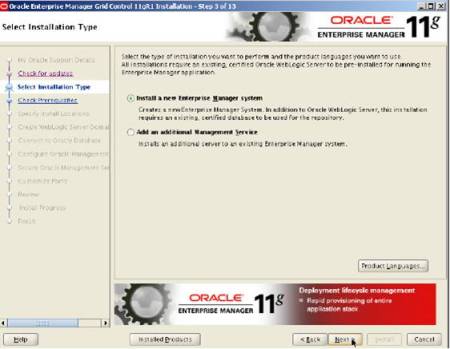
3- Choose “Install a new Enterprise manager system” option.
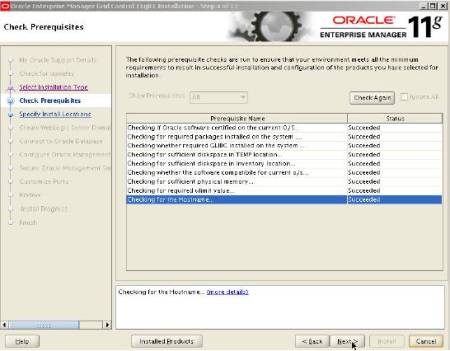
4- If everything is OK, then let’s continue
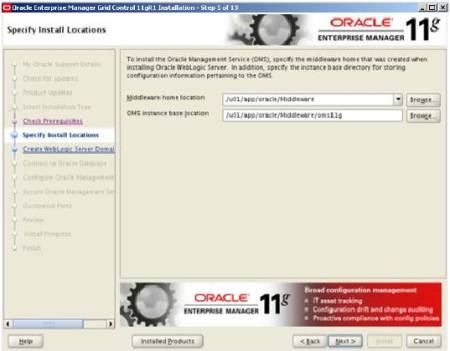
5- Middleware home ve base dizinlerimizi girip devam ediyoruz.
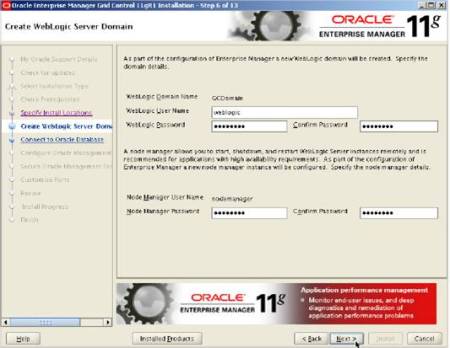
6- Enter strong passwords for weblogic and nodemanger.
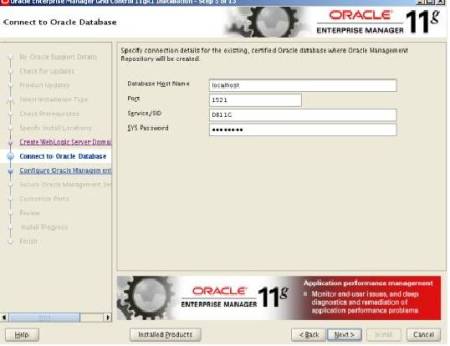
7- Enter repository database connection information such as database host name, listener port number, SID ans SYS password.
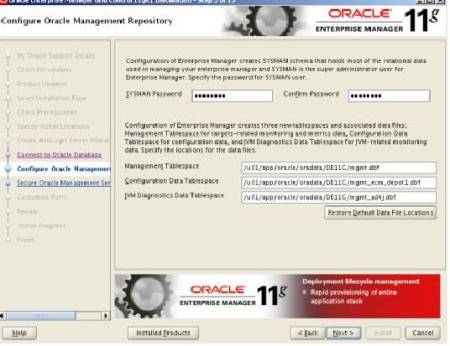
8- Enter SYSMAN user password.
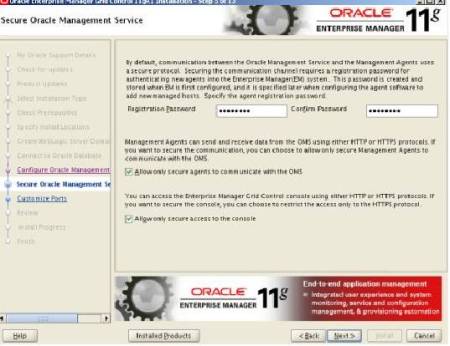
9- Enter registration password. It needed for agent registration.
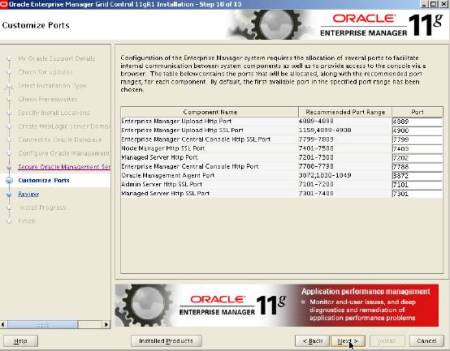
10- Accept default port numbers and click Next
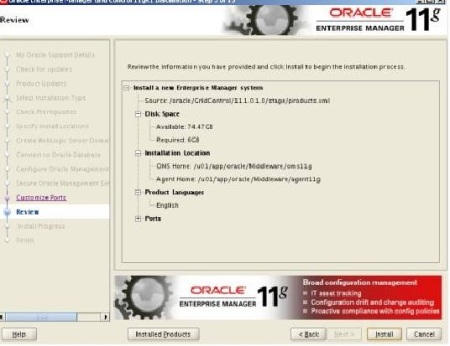
11- Click Install button to start installation.
12- After installation you must run allroot.sh script with root user.
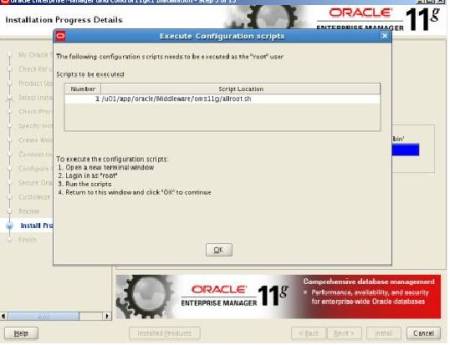
The output of script as follows.
cd /u0/app/oracle/middleware/oms11g/
# ./allroot.sh
Starting to execute allroot.sh ………
Starting to execute /u0/app/oracle/middleware/oms11g/root.sh ……
Running Oracle 11g root.sh script…
The following environment variables are set as:
ORACLE_OWNER= oracle
ORACLE_HOME= /u0/app/oracle/middleware/oms11g
Enter the full pathname of the local bin directory: [/usr/local/bin]:
The file “dbhome” already exists in /usr/local/bin. Overwrite it? (y/n)
[n]: n
The file “oraenv” already exists in /usr/local/bin. Overwrite it? (y/n)
[n]: n
The file “coraenv” already exists in /usr/local/bin. Overwrite it? (y/n)
[n]: n
Entries will be added to the /etc/oratab file as needed by
Database Configuration Assistant when a database is created
Finished running generic part of root.sh script.
Now product-specific root actions will be performed.
Adding entry to /etc/oratab file…
Finished execution of /u0/app/oracle/middleware/oms11g/root.sh ……
Starting to execute /u0/app/oracle/middleware/agent11g/root.sh ……
Running Oracle 11g root.sh script…
The following environment variables are set as:
ORACLE_OWNER= oracle
ORACLE_HOME= /u0/app/oracle/middleware/agent11g
Enter the full pathname of the local bin directory: [/usr/local/bin]:
The file “dbhome” already exists in /usr/local/bin. Overwrite it? (y/n)
[n]: n
The file “oraenv” already exists in /usr/local/bin. Overwrite it? (y/n)
[n]: n
The file “coraenv” already exists in /usr/local/bin. Overwrite it? (y/n)
[n]: n
Entries will be added to the /etc/oratab file as needed by
Database Configuration Assistant when a database is created
Finished running generic part of root.sh script.
Now product-specific root actions will be performed.
Finished product-specific root actions.
Adding entry to /etc/oratab file…
Finished execution of /u0/app/oracle/middleware/agent11g/root.sh ……
13- After running script click OK button. It starts to configuration.

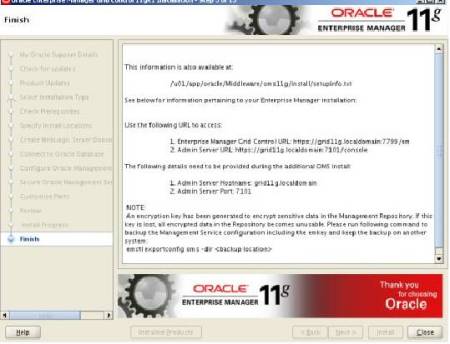
14- After configuration click “close” button.
15- For shutting down Grid Control you must do following steps.
export OMS_HOME=/u0/app/oracle/Middleware/oms11g
export AGENT_HOME=/u0/app/oracle/Middleware/agent11g
$OMS_HOME/bin/emctl stop oms -all
$AGENT_HOME/bin/emctl stop agent
$sqlplus / as sysdba
SQL>shutdown immediate;
16- For starting up Grid Control you must do following steps.
export OMS_HOME=/u0/app/oracle/Middleware/oms11g
export AGENT_HOME=/u0/app/oracle/Middleware/agent11g
$sqlplus / as sysdba
SQL>startup;
$OMS_HOME/bin/emctl start oms
$AGENT_HOME/bin/emctl start agent
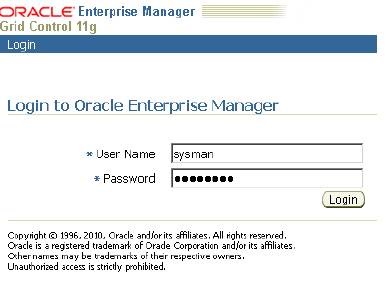
17- login as SYSMAN user to Grid Control.
18- Accept License Agreement.
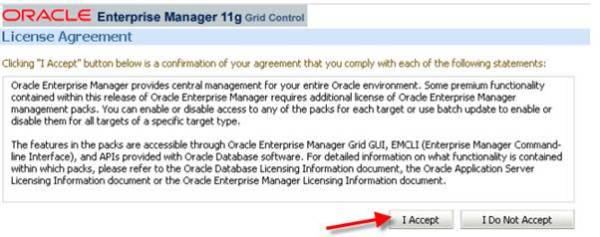
Now, You can monitor your databases. Good Luck.
No comments:
Post a Comment